
While these ornaments are just almost as inexpensive as the ornaments I discussed last time, they are more time consuming and require more skill to assemble and create. This is not to say that they are "hard" to do per-se, but novice crafters may get discouraged based on the preparation and shear amount of time you may invest.
Red Felt Poinsettia Ornament
Materials needed: red felt
sharp sewing scissors
fine-tipped black permanent marker
red thread (to match the felt)
golden beads
a sewing needle that is small enough to fit through the holes on the beads
straight pins
yarn, thread, or ribbon to act as an ornament hanger
patterns you would like to trace for the petals.
The first ornament we will discuss this week is the felt poinsettia. Gather together all of the materials for the project before beginning. I used a basic a fall leaf shape that reminded me of a poinsettia petal, making 3 sizes of the same petal shape to allow for varied flowers. These will take over an hour from start to finish.
Plan your pattern layout in order to get as much use from the piece of felt as possible. I alternated the positions of petals to utilize any extra spaces available. Save the scraps between the petals for other projects whenever possible, these are what I have used for Rudolph's nose, Christmas ornaments on felt trees, etc. Let your imagination run wild. I try to have a roughly equal number of each petal size.
In order to save some time, two pieces of felt together can be pinned together with straight pins. More can be used, but I have found that cutting more than 2 felt shapes at a time results in an unsatisfactory product. I pin each leaf that I traced individually to avoid as much fabric shifting as possible when cutting out your pattern. This will also help your leaves stay more organized when you go to assemble your ornaments later.
As you cut out your petals, stack each different size into a pile with other petals of equal size. This will create less sorting work to do later as well.
Once the entire sheet of petals (or bracts if you are being scientific) is cut out, it is time to begin to assemble your flower. This is an artistic arrangement only the ornament creator can decide (scientifically correct just doesn't look as interesting, sorry). I have used anywhere from 3-8 of the same sized petals per layer. Anywhere from 1 to 3 layers can be used for your ornament depending on how full you would like for it to look. It may take several dry runs to get your flower petals arranged in a pleasing manner. Once it is set up, use straight pins to prevent petal shifting while you get them stitched together. Small, short stitches will make the petals secure, yet will be less noticeable.
 After the petals are securely stitched together, it is time to add some detail. I use a variety of gold plastic beads to add interest to the middle and gives it a more realistic look. I have also stitched down the center of the petals to add a bit of a design. To make the design stand out, use a contrasting color.
Don't forget to sew a hanger onto the back!
Bread-Glue Dough Ornaments
Materials needed: 3 slices of day old white bread
2 Tablespoons of glue
1/2 teaspoon of hand lotion
plus optional ingredients food coloring and water if desired.
This ornament uses up your day old bread! Say what? Yup. It's called Bread-Glue Dough! The ingredients are simple, inexpensive, and they are items that are probably laying around your house.
Remove the crusts from 3 bread (to keep a consistent dough color) and break into pea sized pieces. Drizzle the glue and lotion over the bread crumbs, then knead together until it has a consistency like dough. This could take about 8-10 minutes or so.
Once it has the consistency of dough, you may separate different portions and die the dough with food coloring. Work with one portion at a time keeping the rest of the dough covered to prevent it from drying out.
I rolled out the dough and cut into shapes with cookie cutters and I also formed it into charms with a silicone mold container. Be aware that the dough likes to hang on and may need to be cut away with a butter knife to prevent rough edges.
Allow to air dry for at least a week. I allowed mine to dry on a sheet of wax paper on a cookie sheet so they could quickly and easily be moved at a moment's notice. The wax paper will not only prevent the ornaments from sticking to the cookie sheet, but it also kept them from getting stained by the rust spots on my old cookie sheets. Rather than use food coloring to dye the dough, I will paint these with acrylic paint. The small ones seemed to be dry already after just a couple of days, but I want to make sure they are completely dry both inside and out prior to decorating and finishing. I am afraid that finishing them too soon would trap moisture inside which could destroy them.
For a porcelain-like finish mix equal parts of glue and water together, brush on several coats allowing time for them to dry in between coats. This will act as a glaze for your ornaments.
I have included a picture of a hand painted ornament here that I painted previously. While this is not an ornament I did this year with this recipe, it is an example of what a hand painted ornament can look like upon completion. It is a plaster ornament that I bought from a large chain discount store. Sadly, they do not sell these any more so I am currently looking for a way to create my own. For many years my children painted one of these ornaments for each of their grand parents.
When painting your ornament, use one color at a time and allow to dry completely before adding the next color. If you use many colors while they are still wet, this will promote a mixing of colors on your ornament. I paint the base coat first and add details when the base coat is dry.
Foam Sequined Ornament
Materials needed:
Styrofoam ball, any size
sequins, any size
pins
ribbon
glue, beads, and permanent marker or paint, if desired
One of my all time favorite ornaments is the Styrofoam balls with sequins pinned to them with either straight pins or sequin pins. Where else can you add so much bling to your tree for so little money? Buying a variety pack of sequins incurs less up-front expense if you would like a variety of colors, but then you will need to sort the sequins into colors and sizes. This project will probably take at least an hour to complete if you are planning to completely cover the ball with sequins, more if you layer the sequins. You may also choose to leave spaces open in between the sequins, your choice.
The glue is not needed, but it will help to keep the sequins secure. This is especially helpful if you have little ones or animals. My cats like to play with anything they can reach on our tree, so I like to be extra careful. It also helps to hold the sequin in place while you line up the pin with hole. This is especially useful if you intend to layer sequins with other sequins. Coloring the foam is also unnecessary but may be desired since it is difficult to cover the entire surface of the ball with sequins.
A quick note here: please check the size of the holes in your sequins against the size of the heads of your pins. If the heads are too small they will slip right through the sequin and will therefore serve no purpose. If that is the case, smaller sequins or beads may be used to assist the pins in doing their job.
If you are coloring your foam ball as a foundation color make sure to color it in advance and allow to dry prior to beginning the rest of the project. Brush on glue if you are choosing to use this. Only glue small areas at a time to ensure the glue does not dry before you are able to place your sequins on it.
Begin a foundation row. Alternatively, you may also begin at the top and work outward in circles depending on the pattern you would like your ornament to have. Overlapping the edges of the sequins will give you a different look compared to others. It also creates a shell that makes pin penetration difficult. Please make sure to leave some room for you hanger pins to be pushed in somewhere on the ornament if you are using an overlapping pattern. Sequins do not need to overlap and can also stand on their own as close to each other or as far away from each other as you would like.
Place your sequin on the foam ball and secure with a pin. Larger foam balls allow for use of longer pins, while smaller pins will need to be used on smaller foam balls. Using long pins may cause problems if the pins reach other and may prevent a tight, secure fit.
Continue placing sequins and pins all over the surface of the foam ball until it is covered. You may use different patterns, designs, words, or pictures though this will cause more difficulty, extra planning, and a longer crafting time.
Once my foam balls were completed, I coated the sequins with a coat of glue. This is not needed and there have been a great many ornaments of this type made without this step.
If you are planning on hanging these on your Christmas tree, you will need a hanger for your ornament. I like to use one that coordinates with the sequins on the ornament. Tie the ribbon tightly, secure with several pins by pushing them into spaces between the sequins. Varying the angle of pin penetration will help to more securely anchor the hanger to your ornament.
Rhinestone Studded Balls
Materials: plain colored or glass ornaments
gemstone glue
rhinestones
sequins
ornament hangers
space to set ornaments or hang to dry
These ornaments are really quick and easy to make. I'm not sure why I didn't think to share them in my last post, but I couldn't pass by the opportunity to share them! What a great way to make inexpensive ornaments look sophisticated and beautiful.
I squeezed some glue into a little painter's palette tray in order to be able to apply glue to specific areas of the ornament and applied the glue to the ornament with a paint brush.
You may need to be creative with where you hang your ornaments to dry. Mine dried on areas ranging from unused jars (think spaghetti sauce jars, etc) to hanging from table centerpieces. The location of drying will give you an idea of how these will be finished. If they are able to hang unobstructed with nothing to cause the gemstones to be moved it can be completely finished in one sitting. If they are to dry while sitting on open jars, you will need to allow areas to dry before continuing on to other areas.
Layering rhinestones on top of sequins adds a truly gorgeous look as does varying the colors of rhinestones used in your picture. Other ideas for these ornaments includes painting them, gluing designs covered on glitter or epsom salts, gluing strips of tinsel, or filling the glass balls a variety of interesting materials.
Happy crafting!
Thank you for stopping by to chat with me. Please leave me a message, I'd love to hear your thoughts! Cindy
 |
| Prepared ornament hung on our tree |
Materials needed: red felt
sharp sewing scissors
fine-tipped black permanent marker
red thread (to match the felt)
golden beads
a sewing needle that is small enough to fit through the holes on the beads
straight pins
yarn, thread, or ribbon to act as an ornament hanger
patterns you would like to trace for the petals.
The first ornament we will discuss this week is the felt poinsettia. Gather together all of the materials for the project before beginning. I used a basic a fall leaf shape that reminded me of a poinsettia petal, making 3 sizes of the same petal shape to allow for varied flowers. These will take over an hour from start to finish.
 |
| Assembled supplies |
In order to save some time, two pieces of felt together can be pinned together with straight pins. More can be used, but I have found that cutting more than 2 felt shapes at a time results in an unsatisfactory product. I pin each leaf that I traced individually to avoid as much fabric shifting as possible when cutting out your pattern. This will also help your leaves stay more organized when you go to assemble your ornaments later.
As you cut out your petals, stack each different size into a pile with other petals of equal size. This will create less sorting work to do later as well.
 After the petals are securely stitched together, it is time to add some detail. I use a variety of gold plastic beads to add interest to the middle and gives it a more realistic look. I have also stitched down the center of the petals to add a bit of a design. To make the design stand out, use a contrasting color.
Don't forget to sew a hanger onto the back!
Bread-Glue Dough Ornaments
Materials needed: 3 slices of day old white bread
 |
| Beginning the crust removal |
1/2 teaspoon of hand lotion
plus optional ingredients food coloring and water if desired.
This ornament uses up your day old bread! Say what? Yup. It's called Bread-Glue Dough! The ingredients are simple, inexpensive, and they are items that are probably laying around your house.
 |
| Dough, ready for shaping |
Once it has the consistency of dough, you may separate different portions and die the dough with food coloring. Work with one portion at a time keeping the rest of the dough covered to prevent it from drying out.
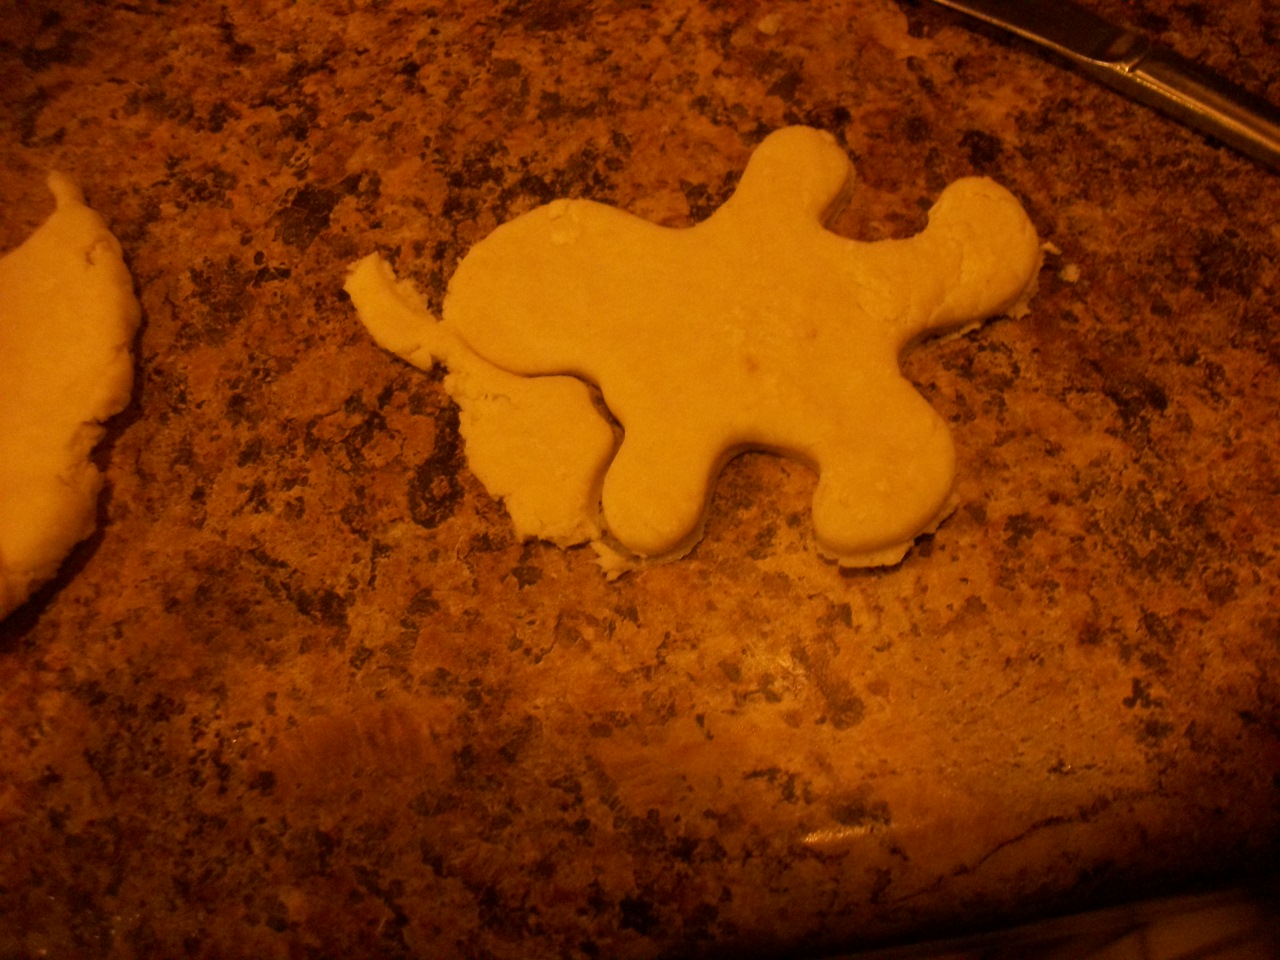 |
| Cut out dough |
Allow to air dry for at least a week. I allowed mine to dry on a sheet of wax paper on a cookie sheet so they could quickly and easily be moved at a moment's notice. The wax paper will not only prevent the ornaments from sticking to the cookie sheet, but it also kept them from getting stained by the rust spots on my old cookie sheets. Rather than use food coloring to dye the dough, I will paint these with acrylic paint. The small ones seemed to be dry already after just a couple of days, but I want to make sure they are completely dry both inside and out prior to decorating and finishing. I am afraid that finishing them too soon would trap moisture inside which could destroy them.
 |
| Ornaments drying on wax paper |
 |
| Hand painted tree |
When painting your ornament, use one color at a time and allow to dry completely before adding the next color. If you use many colors while they are still wet, this will promote a mixing of colors on your ornament. I paint the base coat first and add details when the base coat is dry.
 |
| The foundation row |
Materials needed:
Styrofoam ball, any size
sequins, any size
pins
ribbon
glue, beads, and permanent marker or paint, if desired
One of my all time favorite ornaments is the Styrofoam balls with sequins pinned to them with either straight pins or sequin pins. Where else can you add so much bling to your tree for so little money? Buying a variety pack of sequins incurs less up-front expense if you would like a variety of colors, but then you will need to sort the sequins into colors and sizes. This project will probably take at least an hour to complete if you are planning to completely cover the ball with sequins, more if you layer the sequins. You may also choose to leave spaces open in between the sequins, your choice.
 |
| An overlapping pattern |
A quick note here: please check the size of the holes in your sequins against the size of the heads of your pins. If the heads are too small they will slip right through the sequin and will therefore serve no purpose. If that is the case, smaller sequins or beads may be used to assist the pins in doing their job.
 |
| A variety of patterned balls |
 |
| Glue coated ornaments |
Place your sequin on the foam ball and secure with a pin. Larger foam balls allow for use of longer pins, while smaller pins will need to be used on smaller foam balls. Using long pins may cause problems if the pins reach other and may prevent a tight, secure fit.
 |
| Finished ornament on our tree |
Once my foam balls were completed, I coated the sequins with a coat of glue. This is not needed and there have been a great many ornaments of this type made without this step.
If you are planning on hanging these on your Christmas tree, you will need a hanger for your ornament. I like to use one that coordinates with the sequins on the ornament. Tie the ribbon tightly, secure with several pins by pushing them into spaces between the sequins. Varying the angle of pin penetration will help to more securely anchor the hanger to your ornament.
 |
| glue dots |
Materials: plain colored or glass ornaments
gemstone glue
rhinestones
sequins
ornament hangers
space to set ornaments or hang to dry
 |
| Layered ornament |
I squeezed some glue into a little painter's palette tray in order to be able to apply glue to specific areas of the ornament and applied the glue to the ornament with a paint brush.
 |
| Finished |
Layering rhinestones on top of sequins adds a truly gorgeous look as does varying the colors of rhinestones used in your picture. Other ideas for these ornaments includes painting them, gluing designs covered on glitter or epsom salts, gluing strips of tinsel, or filling the glass balls a variety of interesting materials.
Happy crafting!
Thank you for stopping by to chat with me. Please leave me a message, I'd love to hear your thoughts! Cindy
6 comments:
Love the bread dough ones cause your creativity can go wild if you have a crafting mind. But the others are all so nice as well, especially if you like bling.
Karen
Well the sparkly things catch the Christmas tree lights, that's the main reason I like to add bling. Glad you made it Karen! :D
Let's see if I can post...cute ideas! Gives me a few ideas of my own for the boys to make ornaments. Thanks Cindy!
You're welcome. Happy crafting!
adorable!!! Good job, lady!!! :)
~Heather
Such fun to see your creativity on display.You certainly have more talent and patience than I do.
Wicked cold Wisconsin weather today, right?
Post a Comment